
What is the Minimum Size for a Logo Inside a QR Code? (A Designer's Guide to the Quiet Zone)
Embedding a logo inside a QR code is a fantastic way to boost brand recognition, but it comes with a critical trade-off: **readability**. A successful design is a balance between visual appeal and functional scanning.
🔑 The Logo Size Guideline: A Maximum, Not a Minimum
There is no universal "minimum size" for a logo inside a QR code. Instead, the design challenge is managing the **maximum size** the logo can occupy without making the code unscannable. This is governed by the QR code's **Error Correction Level (ECL)**.
Understanding Error Correction Level (ECL)
ECL is the QR code’s built-in redundancy, allowing a portion of the code to be damaged or obscured (like by a logo) and still be scanned successfully. The higher the ECL, the larger the logo you can safely place, but this also increases the overall module density, requiring a larger physical QR code size to remain readable.
| Level | Redundancy (%) | Logo Coverage Guideline |
|---|---|---|
| L (Low) | Up to 7% | Not Recommended for logos. Use for minimum size codes. |
| M (Medium) | Up to 15% | **Safe for small, simple logos.** Good balance of size and scannability. |
| Q (Quartile) | Up to 25% | Recommended for most logos. Allows more complex designs. |
| H (High) | Up to 30% | Maximum coverage. Use for complex or large logos, but be aware of the increased module density. |
Designer Rule of Thumb: When embedding a logo, always choose **Level M or Q**. The logo should occupy no more than about 15-30% of the entire data area, positioned in the center. After designing, **test the code relentlessly** using multiple devices and scanning apps.
Here's an example illustrating how a logo can be incorporated into a QR code, showing the balance between the logo and the scannable data.
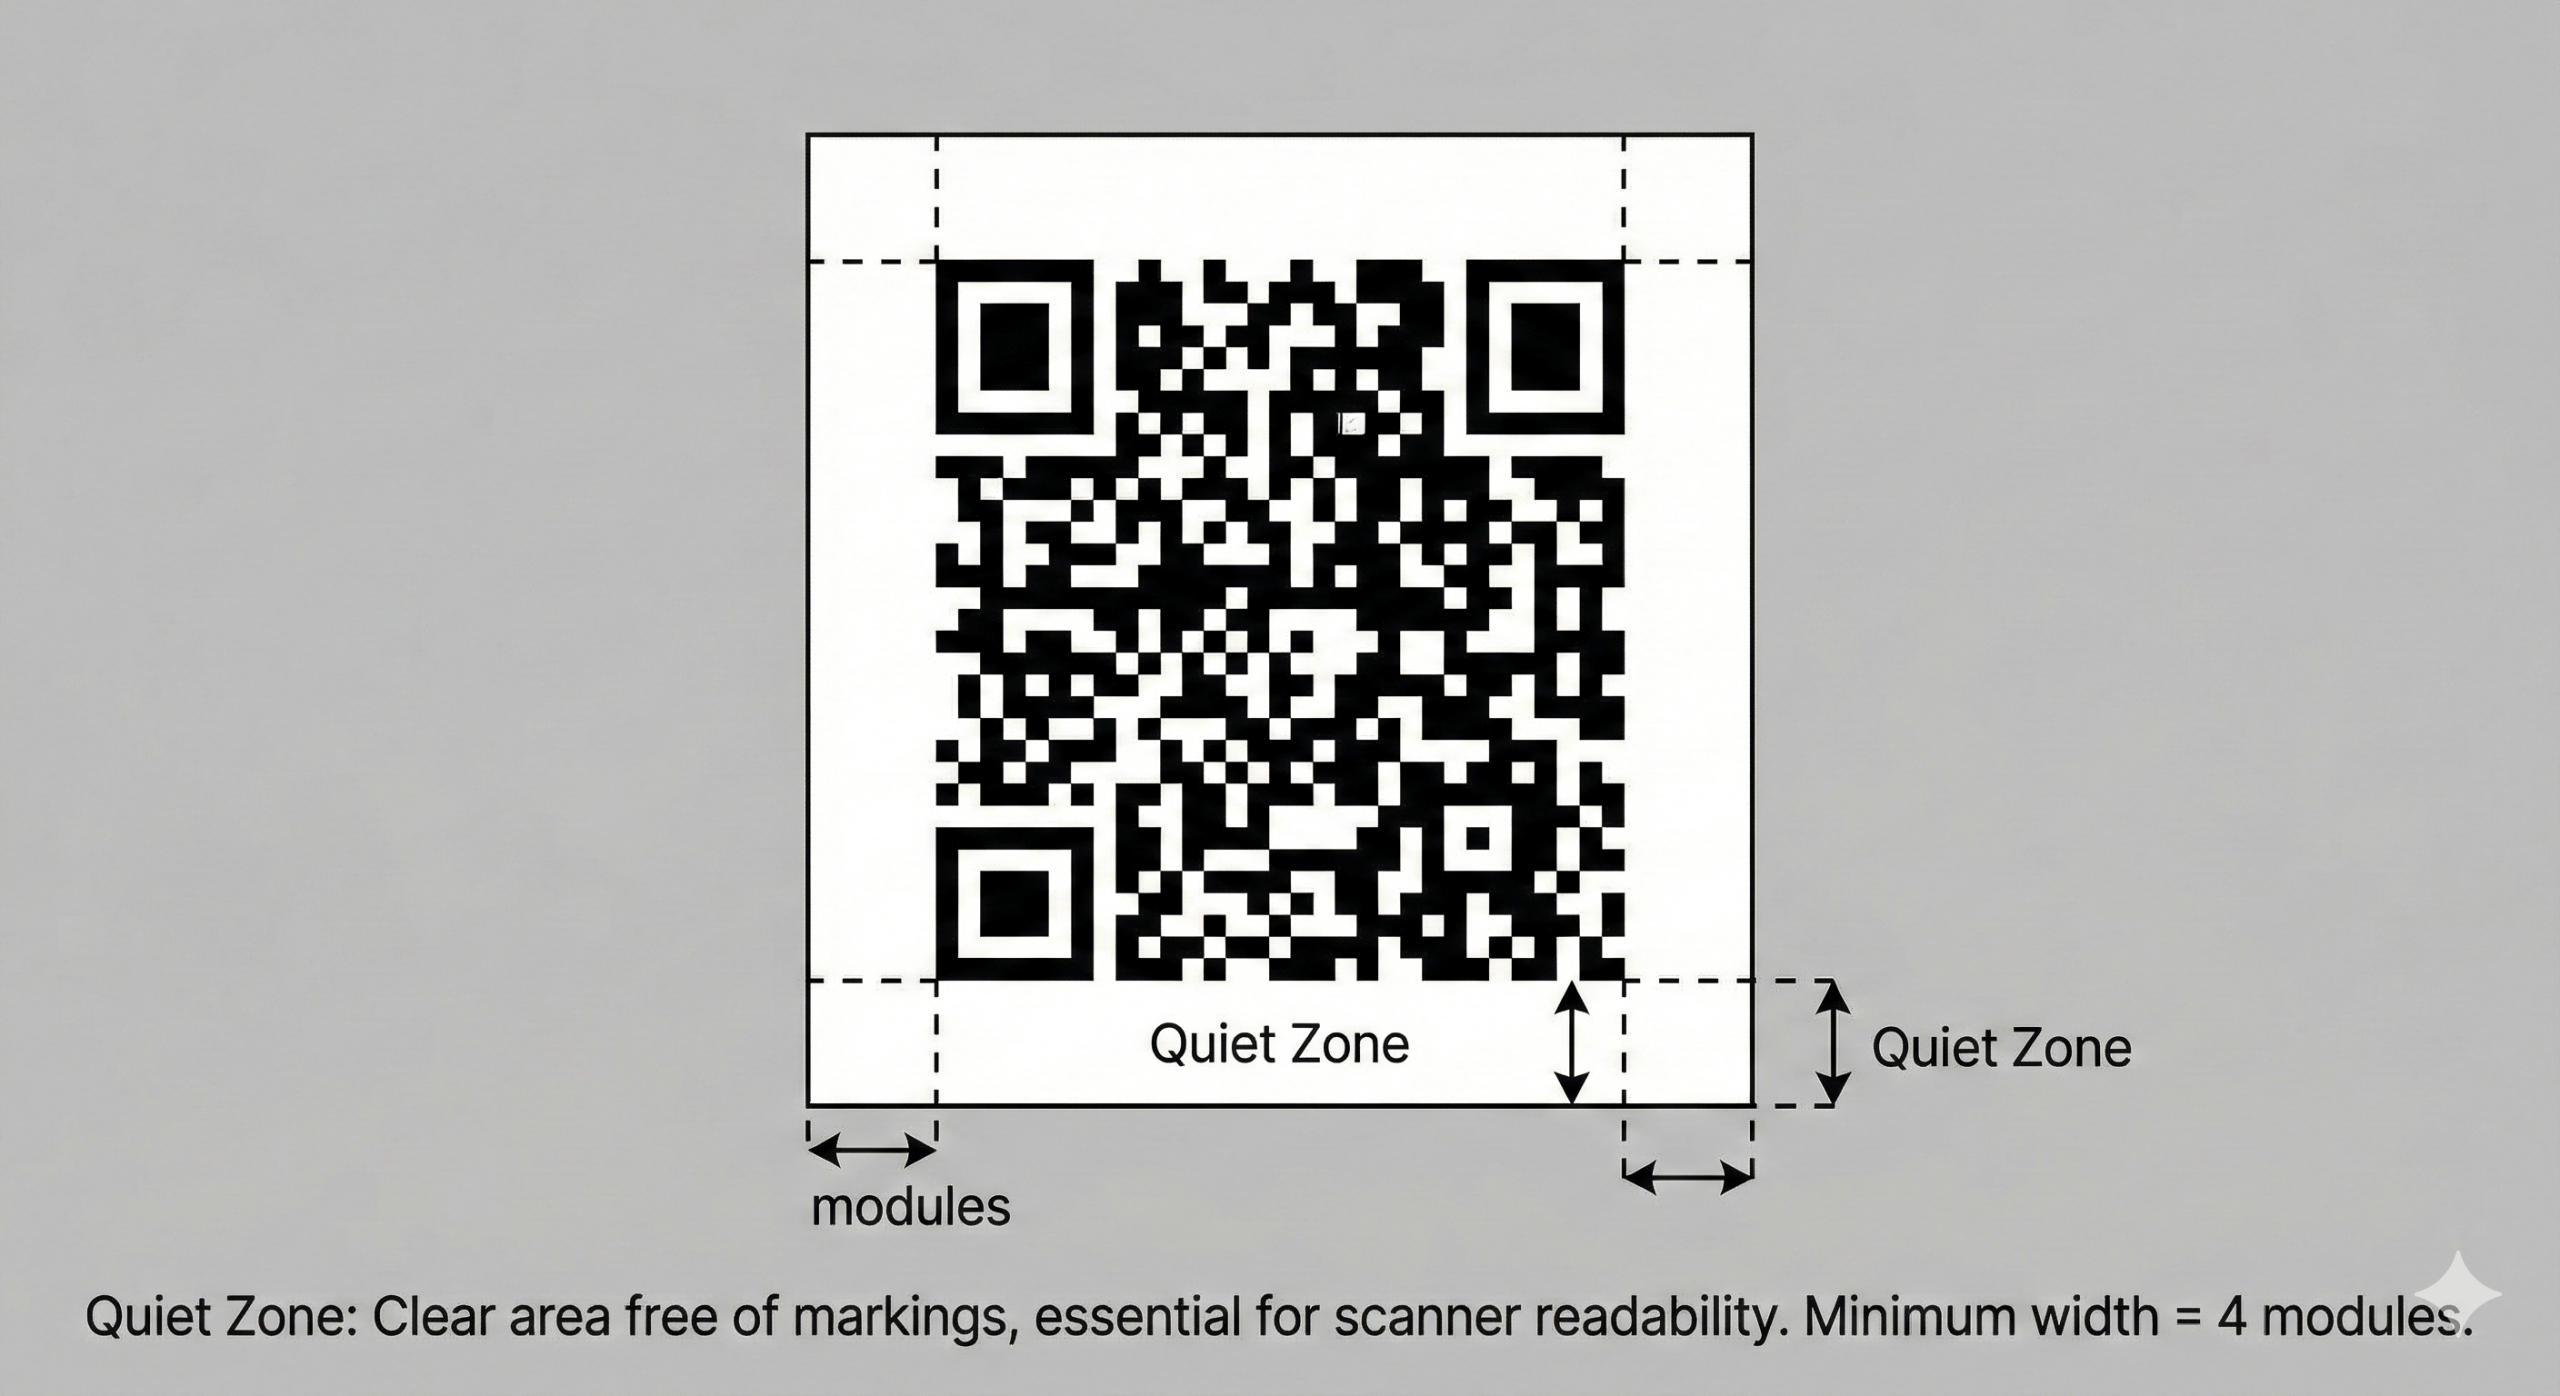
⬜ The Quiet Zone: A Non-Negotiable Necessity
The **Quiet Zone** is the clear, unprinted, empty space that surrounds the QR code on all four sides. It is *not* part of the code itself, but it is **absolutely critical** for successful scanning. The scanner uses this white border to accurately identify the boundaries of the QR code.
The 4-Module Rule
The **ISO 18004 standard** specifies that the Quiet Zone must be at least **four modules (four of the small squares) wide** on all sides.
Failure to provide this clear buffer—whether by printing too close to the edge, adding text, or allowing design elements to infringe—will cause most scanners to fail. The quiet zone must be a uniform, high-contrast color (usually white) against the QR code's dark modules.
Visualizing the quiet zone is key to understanding its importance.
📏 Practical Minimums for Overall QR Code Size
The physical size of the QR code dictates the overall success, as a logo inside a code that is too small to begin with will be utterly useless.
- Close-Up Scans (Business Cards, Small Packaging): Aim for a minimum of **2 x 2 cm (0.8 x 0.8 inches)**. This is a common baseline for most modern smartphones.
- Mid-Range Scans (Flyers, Brochures): Target at least **2.5 x 2.5 cm (1 x 1 inch)** or larger.
- Long-Distance Scans (Posters, Billboards): Use the **10:1 Rule**. For every 10 units of distance the code will be scanned from, the code should be 1 unit in size (e.g., a 10-meter scanning distance requires a 1-meter QR code).
Remember, the smaller the code, the tighter the modules, and the more likely a logo is to cause a scan failure. **Always err on the side of making the QR code (and the quiet zone) larger.**
Consider the impact of physical size on scan success:


